Promote Cycling in Your Area
Attract cycle tourists to your area, or share cycling routes for bike clubs and groups. Easy to build, professional on-line portal. No cost to build, if you like it pay $75 to publish your first ten routes. Need help? Email Your Request.
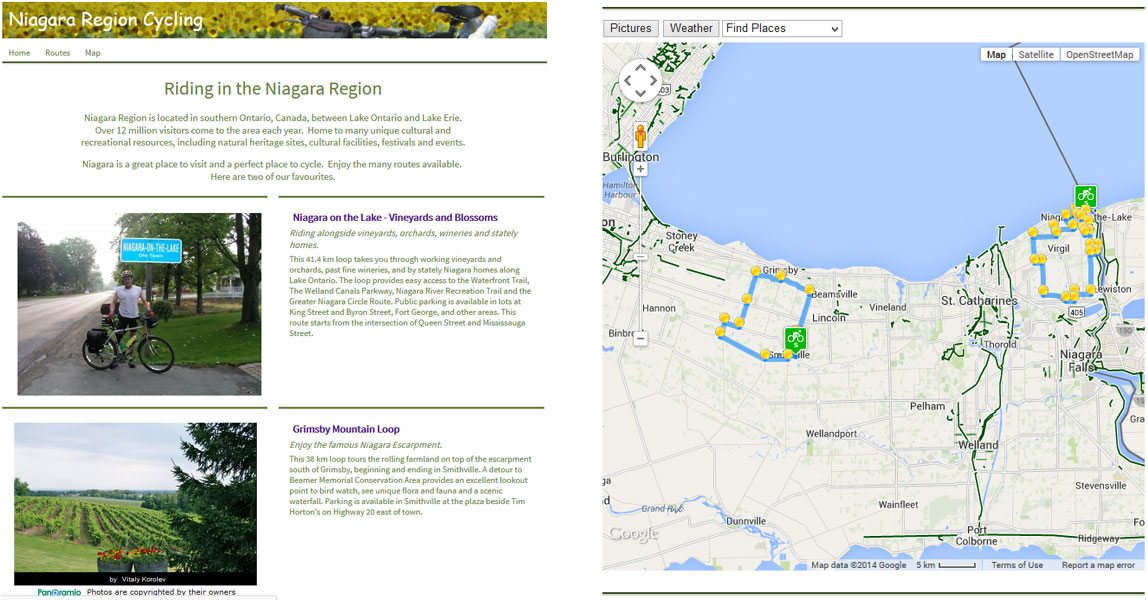
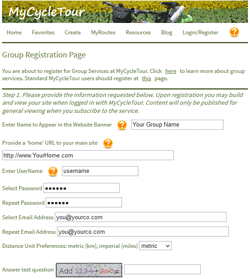
Check out a simple sample site by clicking here.
Register your group with MyCycleTour by providing some basic information including the name to appear in you page banner.
- Registration Page - Go to the group registration page.
- Provide a Group Name - The group name you provide will appear in the banner of all your pages.
- Provide a User Name and Password - This will be registered with MyCycleTour to identify you.
- Identify Your Home URL - This provides a link back to your main URL (optional).
- Provide Your Email Address - We use this to confirm your registration and to securly log you in to make additions to your page(s).
- Complete the Registration - Agree to the Terms of Service and confirm your registration using a link we will email to you.
Map each route and provide a summary description using a simple tool provided by MyCycleTour. Add local images and add markers on the map to highlight customized 'Points of Interest'.
Mapping Each Route
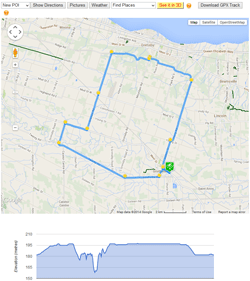
- Go to the 'Create' Page - Login to your account at MyCycleTour and click on the Create menu item.
- Provide Summary Information - Provide a route summary and description. This will show up in your summary page later.
- Map the Route - Click on the map to define your start point, waypoints and end point. Drag markers around to fine tune the route.
- Provide Images - If you have some images of your route you can add them when defining your route.
- Select a 'Primary Image' - The primary image is the main image that will be used to highlight this route. It can be an image your upload, or you can select from public images provided by Panoramio.
- More Detailed Instruction - Get further help in mapping your route from our Resources Section and from our Mapping Tips.
The Edit Window
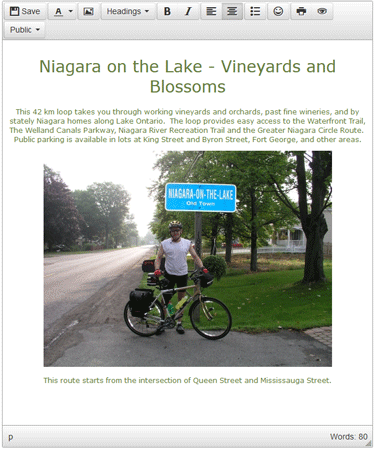
- View Your New Page - Once you submit your route you will be taken to the newly created route page. Bookmark it or find it from the MyRoutes summary page (you must be logged in).
- Customize the Route Introduction - When you are logged in you will see an 'edit window' at the top of your page.
- Be Sure to Add a Title in the Edit Window - Start by adding a title for the route - select 'Headings' from the edit window menu bar and select 'Header 1'. Give your route a name. This name will appear on the summary page later.
- Add Text and Images - Use the remaining space to highlight any information you would like to include - this can include formatted text and images. Don't forget to 'Save' your edits.
Add a New Point of Interest
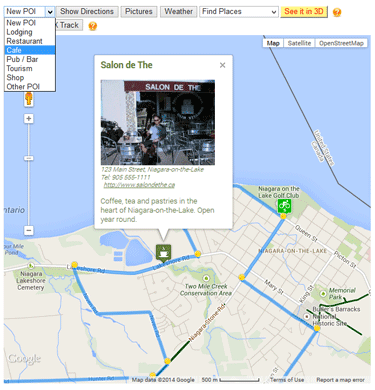
- Add 'New POI' Points of Interest - Look for the 'New POI' menu just above the map.
- Select from a Variety of POI Types - Including Lodging, Restaurant, Cafe, Pub, Tourism, Shop, or Other POI
- Provide POI Information - Title, address, telephone, Internet link, image and description
Create an front page that highlights any or all of the routes that you have defined. Customize this page with some information about your group.
Identify Routes to be Included in the Summary Landing Page
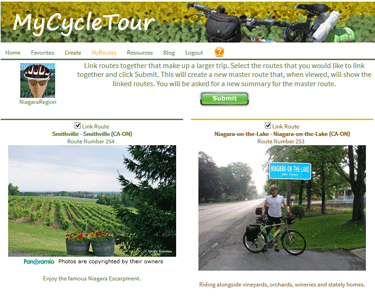
- Index to Your Routes - Create a landing page that shows a summary of all of the routes you have created..
- Selece MyRoutes in MyCycleTour - Go to 'MyRoutes' when logged in at MyCycleTour to see a listing of all of the routes you have created.
- Click on 'Link Routes' - Click the Link Routes button, and select the check box for each route you would like to include in the summary.
- 'Submit' - This will create a new summary page containing all of your routes. Each route will show the primary image, summary and description you provided when defining each route. The title of each route is taken from the first heading provided each route's edit window.
Customize Text and Images for Your Landing Page
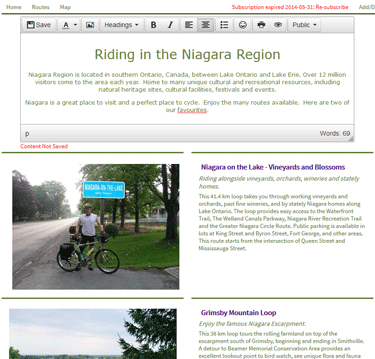
- Provide Some Introductory Content - Once submitted you will be taken to the summary page for your routes. At the top of the page is another edit window which you can customize with a general title, and some content to introduce your routes.
- View as Visitor - You can see what the page will look like to your visitors by selecting the 'View as Visitor' menu item at the top right corner of the page.
- View Individual Routes - View your individual routes by clicking on the image or the title of individual routes presented.
Once you are happy with your site you can publish it for anybody on the internet to see. Package prices start at $75 per year for 10 routes.
Publish Your Site When You are Happy with the Content
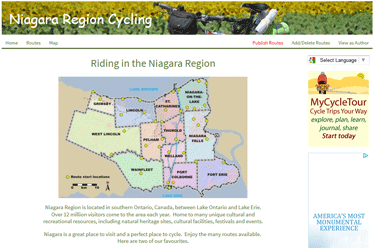
- Create Your Pages Before Publishing - You can build up your routes and summary prior to publishing your page. This ensures that you are pleased with the content and formatting before going live.
- Click the 'Publish' Menu Item on any Route or Summary Page - Click on the 'Publish' menu item when you are ready to go-live. Select your method of payment - as low as $75 for a full year with ten routes. You do not need to publish routes individually - the annual fee covers the cost of hosting your the number of routes specified.
- Custom URL - You can make this page look like it's on your website using a subdomain forwarding rule or a custom frame. Talk to your hosting company.


